Ruby on Rails is a very powerful framework that makes it easy to build a
blog using the standard “Rails Way” of creating an ActiveRecord model
connected to a database for the blog post.
But, for my own blog I wanted to do something slightly different.
I just wanted my blog posts to live in simple Markdown files served
statically from the public directory of the Rails application.
In this article I will explain how I set this up.
This is the first of a series of articles where I go into much more detail and develop the blog system further. This first article shows how I created the initial basic functionality.
Setting up the routes
I want my blog index page to be available at this URL:
/blog
and the individual blog post pages to have URLs similar to these:
/blog/first-blog-post
/blog/second-blog-post

...and so on...
This means that I need to add two new routes to config/routes.rb matching these URL patterns:
Rails.application.routes.draw do
  # URL for the index page
  get "/blog/"

  # URL for the individual blog post page
  get "/blog/:id"
end
As you can see, the individual blog page URL specifies a variable, named :id that holds the page name.
These routes are for GET requests and they need to be mapped to a controller
and two actions.
I will call the controller StaticPostsController, (it could be named any way we
choose) and I’ll be using the standard index and show actions.
I will also name these routes respectively blog and blog_post (using the
as: option), so Rails can generate the blog_path and blog_post_path helpers for us to use
in the views.
Rails.application.routes.draw do
  get "/blog/", controller: "static_posts", action: "index", as: "blog"
  get "/blog/:id", controller: "static_posts", action: "show", as: "blog_post"
end
The controller
Now that we have the routes set up, we need to create the controller file.
I won’t be generating any model for the posts at this time. I may want to create
a Post model later, but for now the controller is all I need.
I type the following command in the terminal to create a basic controller file with the two actions needed and the view files:
$ bin/rails g controller StaticPosts index show
This will create a controller file in app/controllers/static_posts_controller.rb with this content:
# app/controllers/static_posts_controller.rb

class StaticPostsController < ApplicationController
  def index
  end

  def show
  end
end
Now that I have created routes, controller, and views, I need to start thinking
about where to put my blog posts.
Since this is going to be a static blog, I will put my files inside a posts
directory in the public folder.
I create the directory now, along with an initial empty Markdown file:
$ mkdir public/posts

$ touch public/posts/my-first-post.md
Each Markdown file inside the public/posts/ directory will be a blog post.
The post title will be displayed in the blog index page at the /blog/ URL.
In the index page, each post will have a link to the individual post page at a URL like
/blog/my-first-post.
Displaying blog posts
Let’s start with displaying the individual posts first. This job will be handled
by the show action of the StaticPostsController.
Normally, this action will pull one record from the database, and assign it to a
@post instance variable that will be accessible by the view in order to
display the post content.
Since we don’t have a database in our case, we just want to access a post file, and fetch its contents to be displayed as blog posts.
We already have one empty file at public/posts/my-first-post.md, so we can
add some content to it for testing it out:
# My first blog post

This is some random content for my first blog post.
Next we parse our Markdown file into a data structure that
can hold its content so we can assign it to the @post variable in our controller.
For now we will use Ruby’s OpenStruct class to create post objects. We
will probably create a model class later if needed, but let’s just get
started with something simple.
To parse the Markdown I will use a Ruby library called
FrontMatterParser.
This gem has handy methods for easily parsing front matter and content of Markdown
files.
For now we just need the content, but later we will add meta data inside the front matter which can be accessed by the same gem.
To install FrontMatterParser I add it to the Gemfile and run bundle:
# Gemfile

# Gem to parse front matter for static blog posts
gem 'front_matter_parser'
Now that we have a way to read a markdown file let’s display our
blog post.
Here’s the code for the show action in the StaticPostsController. I will
explain what this code does below.
class StaticPostsController < ApplicationController
  def show
    file_path = "#{Rails.root}/public/posts/my-first-post.md"
    parsed = FrontMatterParser::Parser.parse_file(file_path)
    @post = OpenStruct.new(content: parsed.content)
  end
end
- we set up a variable to hold the file path of our post file (the file path is hardcoded for now, but this will be changed later to get the file path from the parameters)
- we call the
parse_filemethod of theFrontMatterParserlibrary, passing along the file path from the previous step - we create an
OpenStructobject with one method (content) that contains the parsed content. - we assign this object to the
@postvariable so it can be displayed in the view.
The view is very simple, we just display the content for now:
<%= @post.content %>
If we now access /blog/my-first-post we should see this exciting page:
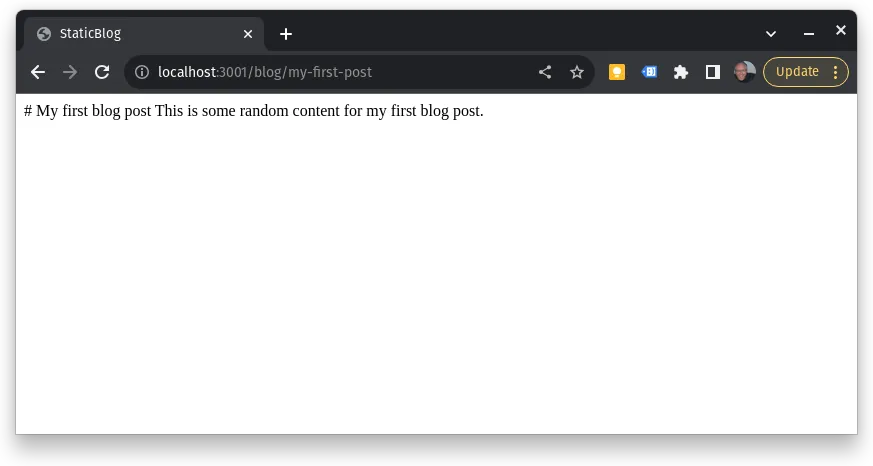
OK, maybe this is not the most exciting page, but it does demonstrate that:
- we can place blog posts in simple Markdown files in the
publicdirectory - we can access these files and view the content in our browser when the
showaction is called.
Formatting the markdown content
One of the problem we are facing at the moment is that our blog post is not formatted
correctly in the view. Even though we write our posts in Markdown, we also want to
display them properly in the browser, so we need our output to be in regular html.
Instead of dumping whatever content is in the files, the page title should be
inside an h1 tag, and the actual content should be enclosed inside paragraph
tags.
We need a method to convert Markdown to html, and this is what another Ruby
library called Redcarpet is all about.
Redcarpet will take our Markdown content and
convert it into html to be displayed in the web browser.
I simply add the gem, like before, to the Gemfile:
# Gemfile

# Ruby library for Markdown processing
gem "redcarpet"
I then save the file and run bundle to install it.
Redcarpet
For details on how to use Redcarpet, feel free to read the gem documentation on Github.
Essentially, we create a helper method called markdown in app/helpers/application_helper.rb.
This method will take in some markdown text and output html.
Inside the ApplicationHelper module we first create a new HTML class that
inherits from Redcarpet::Render. We then define the markdown method which will accept markdown text.
In the method, we add some options
(again, look at the documentation for details). We then create a renderer as an instance of the HTML class created above, and specify some extra options for rendering.
Next, we create a new markdown object, passing the renderer, and the extra
options as parameters.
Finally, we call the render method on it, and this will return the properly
formatted html.
Here’s the code:
# app/helpers/application_helper.rb

module ApplicationHelper
  class HTML < Redcarpet::Render::HTML
  end

  def markdown(text)
    render_options = {
      hard_wrap: false,
      link_attributes: {rel: "nofollow"},
      prettify: true
    }
    renderer = HTML.new(render_options)
    extras = {
      autolink: true,
      no_intra_emphasis: true,
      disable_indented_code_blocks: true,
      fenced_code_blocks: true,
      strikethrough: true,
      superscript: true,
      lax_spacing: true
    }

    markdown = Redcarpet::Markdown.new(renderer, extras)
    raw markdown.render(text)
  end
end
Now we add the markdown helper method to our view like so:
<%= markdown @post.content %>
This is the result:
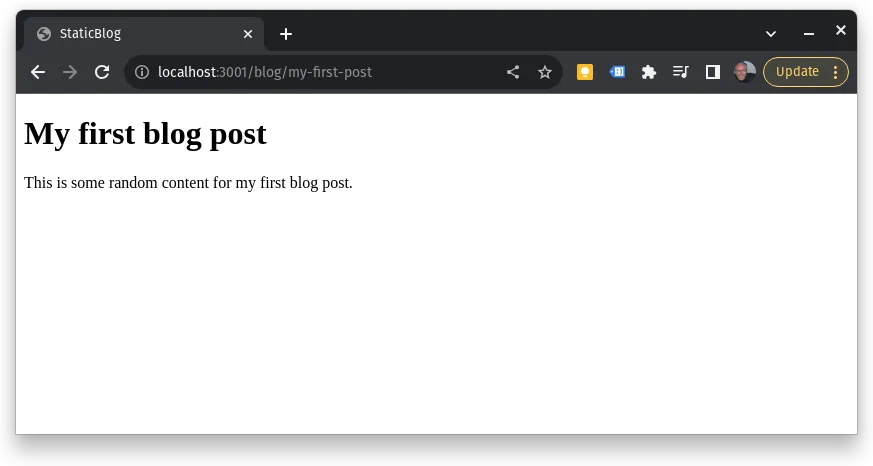
Good! Now our posts are perfectly formatted in html.
Page name parameter
We have solved the problem of displaying html from a Markdown text, but there
is a second problem here. Currently, the path to our blog post page is hardcoded
in the controller like so:
file_path = "#{Rails.root}/public/posts/my-first-post.md"
This will only work for a blog post with that specific file name. What we really want is to be able to specify additional file names in the post URL and have the corresponding page loaded in the browser.
To implement this functionality, we can start by adding a second blog post at
public/posts/second-post.md with this content:
# Second post

This is the second post
We then remove the hardcoded string from the controller, and add a call to
params[:id] so we can extract the :id parameter from the URL and pass it to
the controller.
file_path = "#{Rails.root}/public/posts/#{params[:id]}.md"
This will let us see the second blog post if we go to this URL:
/blog/second-post
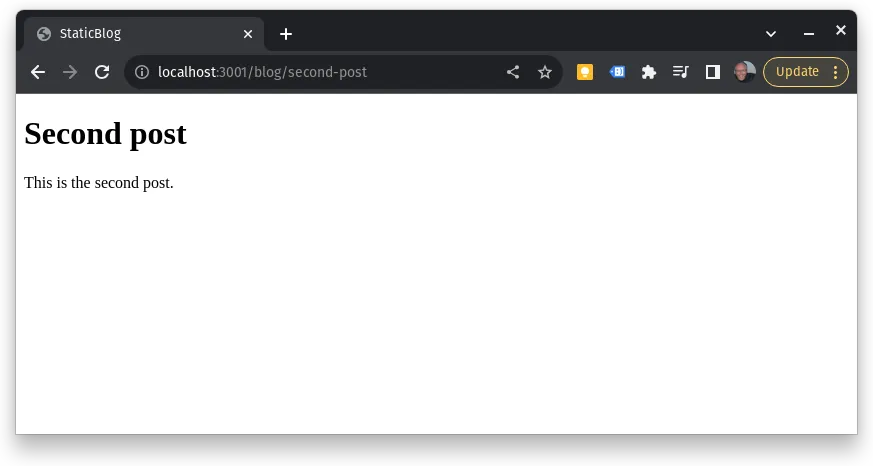
It will also work for any other parameters passed, provided that we have
a file with that name in the /public/posts directory.
Index page
Now that we can view individual blog posts, let’s think about an index page
that shows all the posts with a link to each individual post.
What I am going to do is create a list of all the Markdown file paths inside the
/public/posts directory.
Once I have this list I am going to iterate on it and create a post object
(which will be an OpenStruct for now) for each file. The post object will
include the page content.
Here’s the code:
class StaticPostsController < ApplicationController
  def index
    file_paths = Dir.glob("#{Rails.root}/public/posts/*.md")

    # initialize @posts array
    @posts = []

    file_paths.each do |file_path|
      parsed = FrontMatterParser::Parser.parse_file(file_path)

      # Add the post to the array
      @posts << OpenStruct.new(content: parsed.content)
    end
  end
end
The view is pretty simple.
<h1>Blog</h1>

<% @posts.each do |post| %>
  <div style="margin-bottom: 2rem;
              border: 1px solid gray;
              padding: 1rem;">
    <%= post.content %>
  </div>
<% end %>
Note that in this example I am adding some inline styles to separate the blog posts visually, but in a production version I would use a framework like Tailwind or linked CSS files.
Here’s the result viewed in the browser:
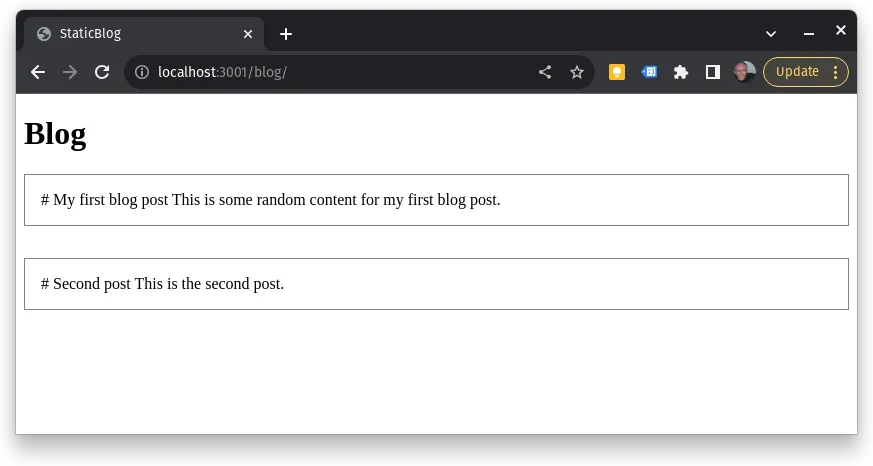
Linking the posts in the index page to the individual post page
We can display all the posts, but there is no way to click a link under each post and load the individual post page.
Since each post slug is the post’s file name without .md, I can simply grab
each file name using a regular expression and add it to a new attribute in the post object called slug.
Then, the slug will be added to each link to the individual post page.
Since the file paths for the posts look something like these:
/public/posts/my-first-post.md
/public/posts/second-post.md
the regular expression to grab the file name will look like so:
# regular expression to extract the file name without `.md`

/posts\/(.*)\.md/
I typically use Rubular to check my regular expression syntax:
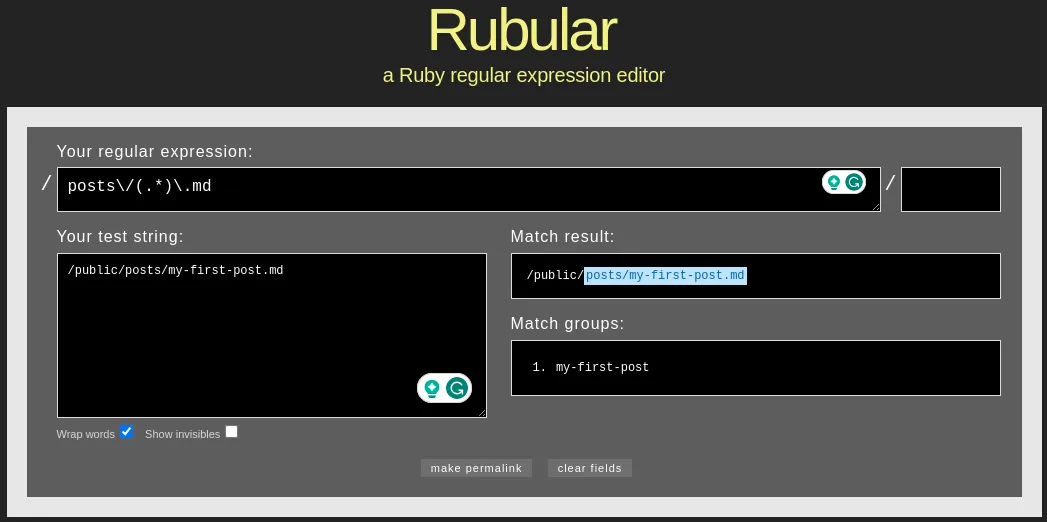
This regular expression automatically saves whatever is found inside the
parentheses (.*), which is the file name in this case, in a Ruby special
variable called $1. We can then use $1 to assign the file name to the slug
attribute in our post object.
Here’s the code to make this happen:
class StaticPostsController < ApplicationController
  def index
    file_paths = Dir.glob("#{Rails.root}/public/posts/*.md")

    # Initialize array
    @posts = []

    # setting up the regular expression
    regex = /posts\/(.*)\.md/

    file_paths.each do |file_path|

      # matching the regular expression and saving the file name into $1
      regex.match(file_path)

      parsed = FrontMatterParser::Parser.parse_file(file_path)

      # $1 contains the matched file name without .md
      @posts << OpenStruct.new(content: parsed.content,
                              slug: $1)
    end
  end
end
We also need to add the link to the individual post pages in the view in
app/views/static_posts/index.html.erb:
<h1>Blog</h1>

<% @posts.each do |post| %>

 [...]

    <%= post.content %>

    <%= link_to "Read more", blog_post_path(id: post.slug) %>

 [...]
<% end %>
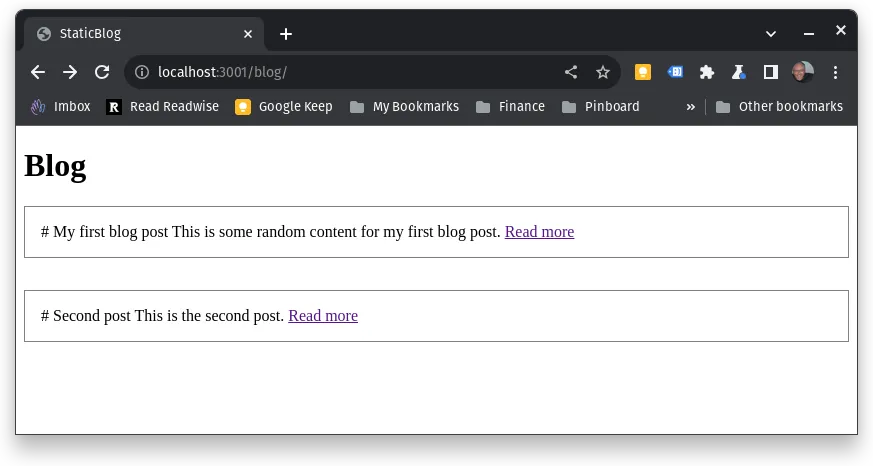
If we now load the blog index page in the browser we can actually see the links to the individual pages, and if we click on them each page should load properly.
Conclusion
Great! We are at the end of this iteration. What we did was:
- set up routes to the blog’s
indexandshowpages - create a controller that finds the appropriate blog posts and hands them to the views so they can be displayed in the browser
- formatted the initial Markdown content into correct
html - used a couple of Ruby gems to help with Markdown parsing and formatting
- created links to each blog post so we can view it in its own web page.
With this, our basic functionality is finished. We can easily add blog posts
written in Markdown to public/posts, and they will automatically show up in
our blog index page, with the appropriate link to each individual post.
In the next iterations we will add some frontmatter to our blog posts, so we can use additional data like: post tile, author, and date of publication.
If you have any comments or suggestions, or just want to say “hi”, you may use the contact form on this site to reach me.
