How do you know if your recent marketing efforts have paid off? Can you accurately gauge how many visitors are converting into valuable leads or customers?
Without this valuable information it’s challenging to make data-driven decisions for optimizing your online presence and boost revenue.
Let’s see how to track your website’s conversion rate and gain insights to drive meaningful improvements.
To follow along with this article, ensure you have a Google Analytics 4 property connected to your website and ready to collect data, and a Google Tag Manager account for the property.
What is a conversion?
The first step in tracking conversion is to clearly identify what constitutes a conversion for your business.
A conversion, in the context of a website, is a specific desired action that a visitor takes, turning them from a simply passive observer into an active participant.
Conversions are directly tied to the website’s objectives such as:
- a contact form submission
- a completed purchase
- a newsletter sign-up
Any action that a visitor takes that fulfills one of your website’s goals is a conversion.
Newsletter signup
Let’s say we have an awesome newsletter with which we hope to grow our mailing list. One of the goals of our website is to track the number of signups to our newsletter.
A common practice is to place the signup form in different areas of our website, like in the main Blog page and in the footer.
Since we have more than one place where the signup form is places, we also need to track which position converts better.
Our form simply asks for the email address and has a signup button.

Passing form parameters
Since we have two separate forms, one in the Blog page, and one in the footer, in order to track the performance of each one of them we need to pass some data to Google Analytics that identifies which form has been submitted.
To do that, we can take advantage of the id attribute of the <form> element inside the html page, and give each form a different id so they are unique.
We will give the <form> in the blog page an id of newsletter-signup, and give the <form> in the footer an id of newsletter-signup-footer.
<form id="newsletter-signup">
<form id="newsletter-signup-footer">
Sending a custom event
Google Analytics sets up a number of events by default, but newsletter_signup is
not one of them.
This is because an event like that is viewed as a custom event, specific to our own site.
To make Google Analytics aware of this custom event and start collecting data on it we don’t really need to set up anything special in Google Analytics itself, but we should create a new tag in Google Tag manager. This new tag will send the newsletter_signup event to Google Analytics, padded with some extra parameter. The extra parameter would be the id of the form that was submitted.
Once the event starts going through, Google Analytics will start tracking it automatically, and adding the event to the reports.
Setting up the tag in Google Tag Manager
As we said earlier, for our custom event we need to keep track of which of the two forms submitted the event.
We distinguish the forms by their id, so we need to set up a variable
in Tag Manager to hold this id string.
We go to Variables > Configure and select Form ID.
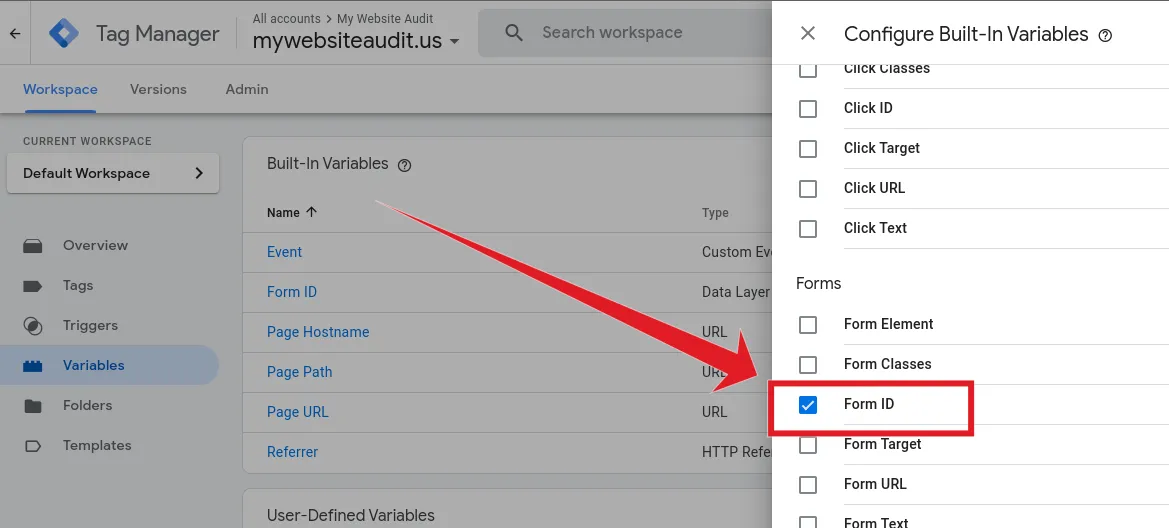
This will set up a variable that captures the id of the form used for the submission, and will send its value as a parameter along with the newsletter_signup event.
With this variable set up, we can now create the tag that will fire when we submit the form.
In Tag Manager, go to Tags > New.
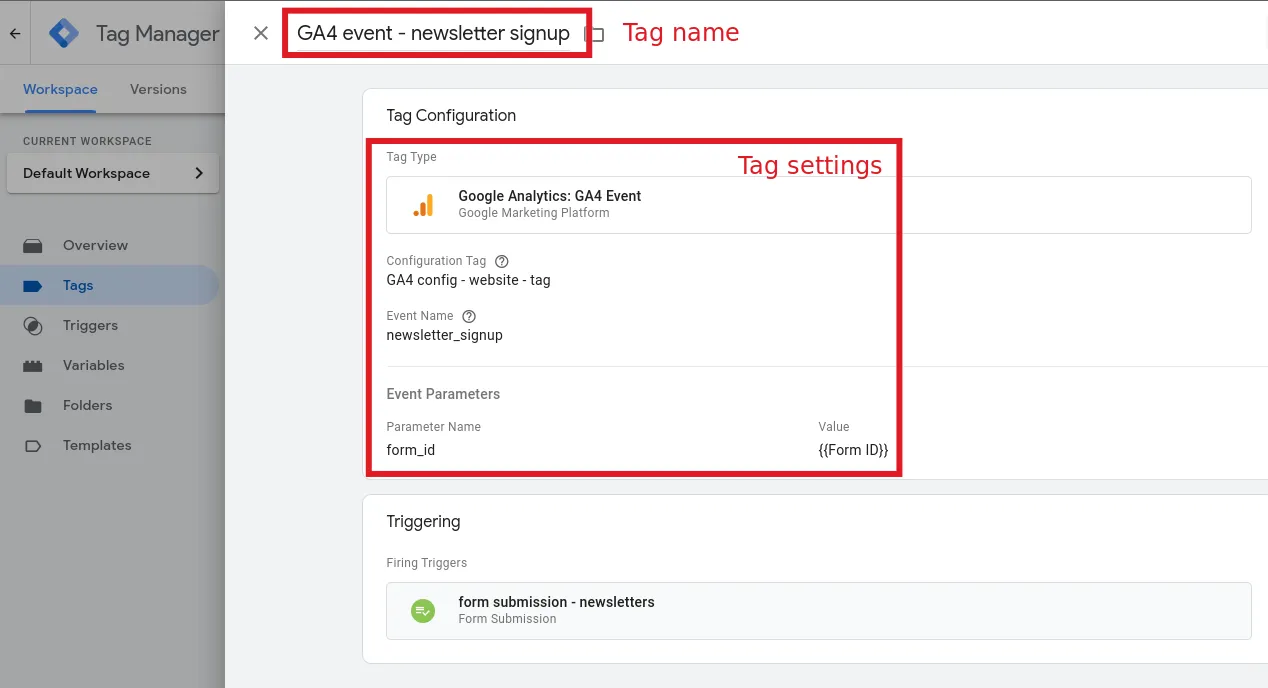
We name the tag GA4 event - newsletter signup and we select GA4 event as Tag type.
We select the GA4 configuration as the configuration tag. We should already have this tag set up from when we configured the Tag Manager container initially.
The name the event can be anything, but we name it newsletter_signup to keep consistency with the events naming scheme used in Google Analytics 4.
Since we need to create a parameter with this event for the tag to submit the form id, we
expand the Event parameters dropdown, and add a new row by clicking on Add row.
We give the parameter the name of form_id and then we click on the little brick icon and select the Form ID variable, which we previously set up in the variables.
This will take care of passing the form id to Google Analytics so we can use it in the reports.
Now that the tag is ready to go, we need to create a trigger to specify when the tag should be fired.
Create a trigger
Click on Triggering and create a new trigger by clicking on the + button.
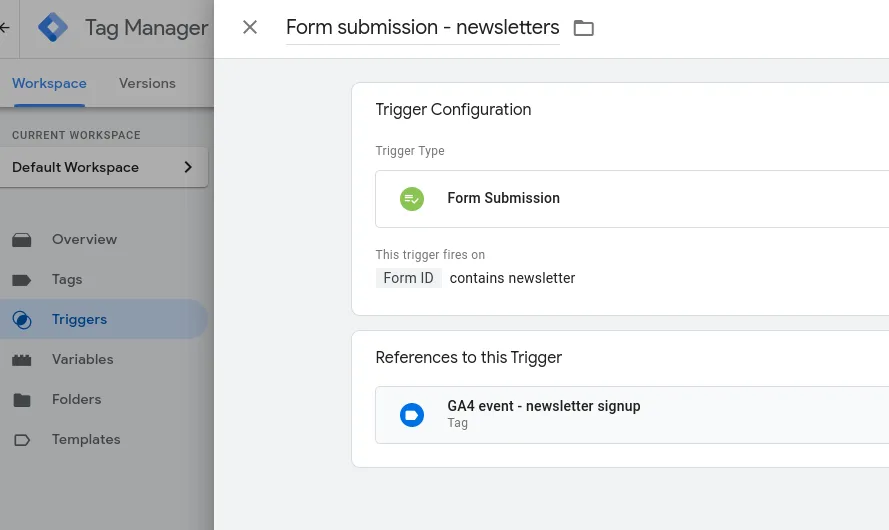
We name the trigger Form submission - newsletters.
For the trigger configuration we choose Form Submission.
We want this trigger to fire only on the newsletter forms, so we select Some forms.
At this point, we need to specify the condition that specifies the forms that fire
this trigger. Since both our forms have an id attribute which contains the
string newsletter, we can use this condition to fire the trigger.
In our trigger configuration, we specify:
Form IDcontainsnewsletter
as a condition to fire the trigger.
We save the trigger, and finally save the tag.
Now, we are ready to test the tag in our browser and make sure everything works as expected.
Testing the tag
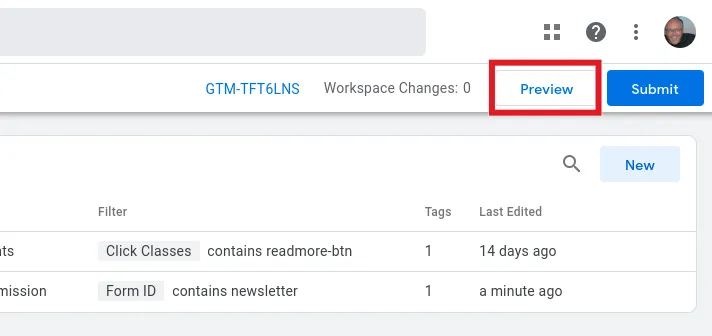
Let’s hit the Preview button at the top of the page in Tag manager.
We are working on this site locally, on our development machine.
The site is
currently served on localhost so we enter this URL: http://localhost:3000, in the debugging window field, and click Connect.
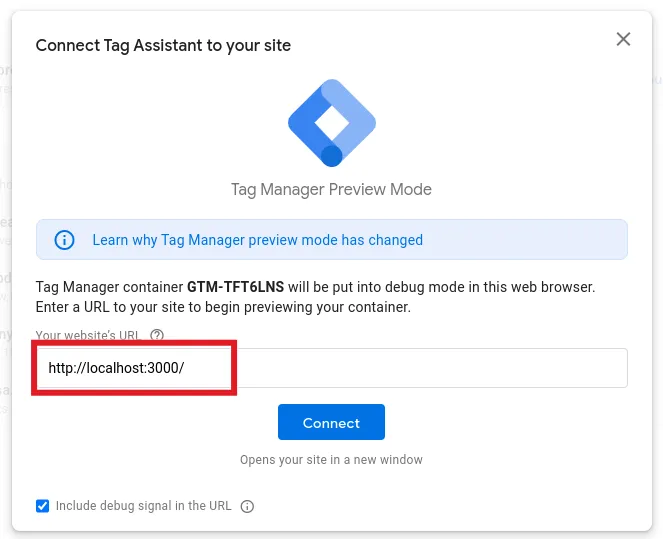
This will launch the site in another browser tab.
Note that if we were debugging the live site, we would have to enter the live URL instead.
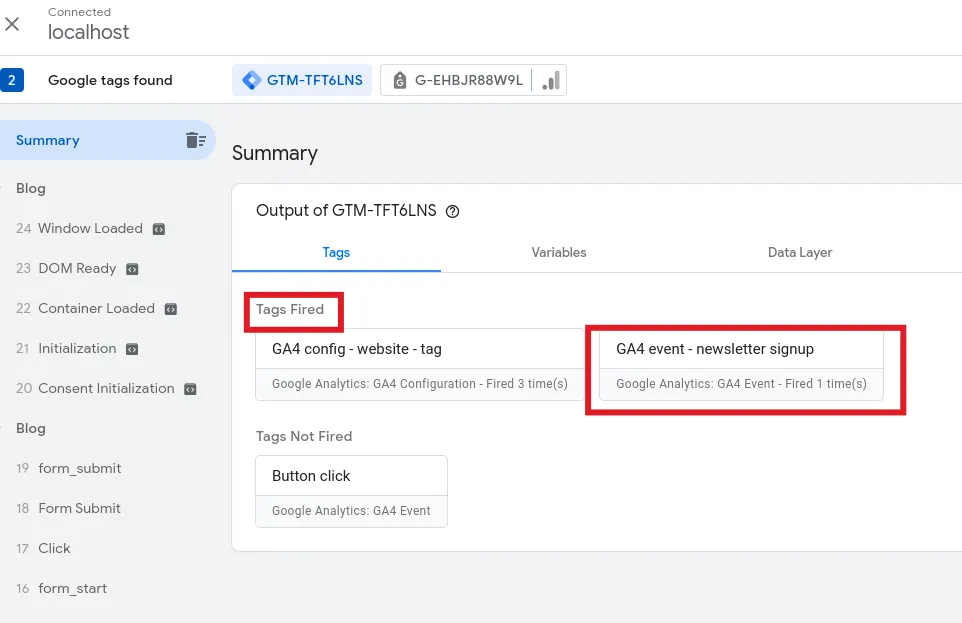
In our testing site, we go to the Blog page, fill out the newsletter form, and submit.
We then go back to Tag Manager tab in the browser. There we can confirm that the newsletter signup event has fired.
Double check in Google Analytics
Now that we have confirmed that the new tag fires correctly in Tag Manager,
we can check the Realtime report in Google Analytics, and make sure that
the newsletter_signup event is received properly.
Note that this works even if we haven’t published the changes to the live site, and we are still on localhost.
In Google Analytics, we open the Realtime report, and under Event count by event name we should see a newsletter_signup event.
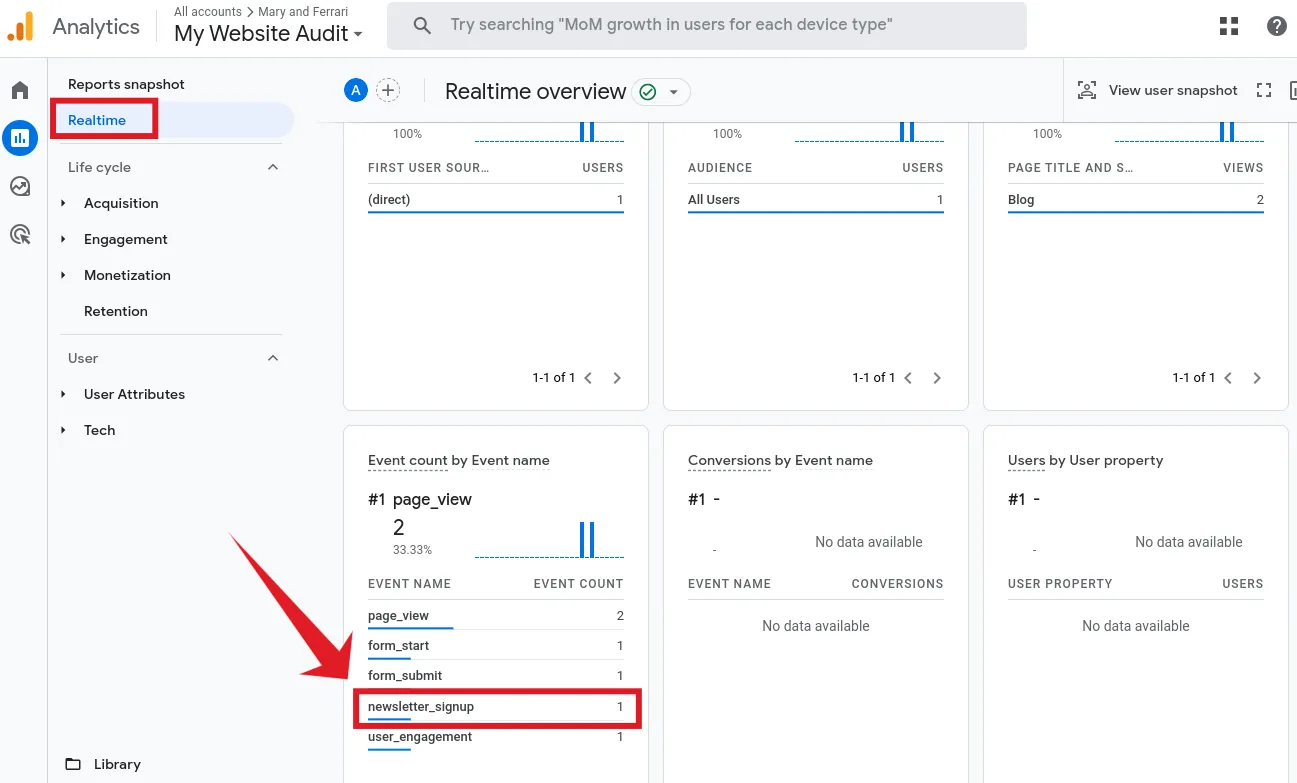
If we click on it, we should see the parameters passed to the event. Among these
parameters we see the form_id parameter that we set up previously.
The parameter should have the value of the form id we used for signing up.
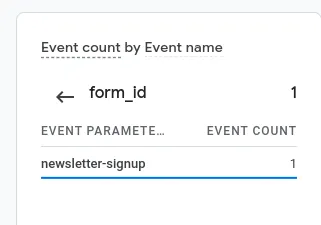
In a similar way, we can now test sending a subscription with the other form and
verify that the appropriate form id parameter value is passed.
Now that we have verified that everything works, we can publish the tag.
Remember that when we make updates in Google Analytics, changes won’t be reflected in the reports before at least 24 hours.
Photo by Pixabay
